Showing posts with label Rum.. Show all posts

18 October 2016

Lemon Drizzle Cake / Bolo drizzle de limão.


There's only two, high quality, cooking shows on TV to which I am totally addicted to:
Masterchef Australia and the Great British Bake Off and since their first season that I don't miss one single episode of both of them.
Great British Bake Off is on its 7th season and not just I never missed one single episode of the 7 seasons but I also have all the Bake Off books available.
Ana had this great idea of challenging us to recreate the Bake Off technical challenges at home.
Being myself a big Bake Off addicted, I couldn't resist the opportunity to take part in this fabulous challenge.
Like Ana (great minds think alike, right?), I always thought of challenging myself at home and try to recreate the technical challenges myself and now is the time to do it.
Ana calls this challenge "Our Great Bake Off" and for October, she challenged us to bake a drizzle cake.
As you all know, I'm a big citrus lover and lemons are on top of my citrus preferences. With that in mind, I couldn't make any other drizzle cake but the only and delicious lemon drizzle cake.
This Raymond Blanc recipe was marked to be baked for years but was forgotten and this is the one I baked for Ana and for "Our Great Bake Off"!
Perfect to eat alongside a cup of tea or coffee, according to Mary Berry and Paul Hollywood, a perfect drizzle cake should have a dome and a crack on top and mine has both of them so, I think I baked a perfect drizzle cake...

4 May 2016

Donauwelle cake / Bolo "Ondas do Danúbio".


As you can read here, the challenge for the 4th edition of the Sweet World is to bake e Donawellen cake.
The Donauwellen cake (also called Danauwelle cake), translated "Danube waves cake", is a traditional cake that is very popular in Germany and Austria.
It's kind of a pound cake with sour cherries, buttercream, cocoa and chocolate. Layered alternating with vanilla and chocolate cake dough, sour cherries and vanilla cream and after the cake is baked and cooled off, a chocolate glaze is applied to the top of the cake and waves are made using a fork.
Apparently, when the cake is cut in squares, it looks a little like the waves of the Danube river from the side.
To tell you the truth, I was not very excited about this theme, as this is not my kind of cake at all.
Surprise, surprise, I have to be honest and the cake is really a delightful surprise.
The combination of flavours, specially when you take one forkful from top to bottom, getting all the layers in the same forkful, it's absolutely stunning and I loved it much more than I would like to...
I found lots of recipes online, but almost all of them uses, or packed cake mix, or packed pudding mix and as I don't like to use those kind of mixtures so, I opted for Patricia's recipe (adjusting some measurements according to my taste and experience) and its all homemade and from scratch.


ingredients for the cake:
3 large eggs
140g caster sugar
1 tsp vanilla paste
100ml vegetable oil
230g self raising flour
150ml whole milk + 1 tbsp extra
2 tsp cocoa powder
400g sour cherries, pitted, well drained if canned or bottled and tossed in flour (I only used about 180g of maraschino cherries, well drained in advanced and tossed in flour).
method:
Preheat the oven to 180ºC.
Grease a 21 x 21cm square tin with butter and line with baking paper (I used a silicone mould).
Combine the eggs, sugar and vanilla in a bowl and whisk until creamy and fluffy.
Add the vegetable oil and whisk until combined.
Fold in 1/3 the flour, alternating with 1/3 of the milk and finishing with the last 1/3 of the flour.
Mix everything together then put 1/3 of the batter aside and the remaining inside the prepared tin.
Mix the cocoa powder and 1 tbsp milk with the 1/3 of the reserved batter and combine everything together.
Spread the chocolate batter over the vanilla batter, being careful to not mix the two batters. Smooth the top.
Distribute the cherries all over and push them lightly into the batter.
Bake for 30 to 40 minutes or until a skewer inserted in the centre of the cake comes out clean.
Unmould the cake over a wire rack and allow to cool completely.
for the creme mousseline:
250ml whole milk
1tsp vanilla paste
1 egg + 1 egg yolk
100g caster sugar
55g cornflour
100g unsalted butter, softened, plus extra if necessary
method:
Heat the milk and vanilla in a saucepan until starting to boil.
Beat the egg, egg yolk and sugar for a few minutes until pale and slightly thickened.
Whisk in the cornflour. 
Whisk the milk into the egg mix. 
Put the whole lot back into the pan and cook over a low heat, stirring all the time until thick and boiling. 
Take the pan off the heat, transfer the mixture to a bowl and cover with cling film to prevent a skin from forming.
syrup:
3/4 cup water
2 tbsp dark rum
1 tbsp caster sugar
method:
Combine all the ingredients in a saucepan and boil until the liquid is syrupy. Set aside.
for the topping:
100g dark chocolate (70%)
50ml whole milk
2 tbsp unsalted butter
method:
Put all the ingredients in a saucepan over a low heat and whisk all the time, until the chocolate is almost completely melted.
Take the pan off the heat and keep whisking until the mixture is totally melted, smooth and glossy. Allow to cool.


to assemble the cake:
Put the cake back inside the tin.
Brush the top with the rum syrup.
Spread the creme mousseline all over the cake and smooth the top with a palette knife.
Gently spread the cooled chocolate mixture over the creme mousseline and create a wave effect with a fork.
Refrigerate until set or over night and when ready to serve, unmold the cake and slice it in squares.

__________________

Tal como podem ler aqui, para a 4ª edição do Sweet World, a Susana desafiou-nos a criar um Bolo Donauwelle.
De origem Alemã e Austríaca, o Donauwelle Cake, também chamado de Donauwellen Cake (e agora, por mim e pela Susana, baptizado de Donald ou Donaldinho), deve o seu nome ao rio Danúbio que atravessa ambos os Países e ás suas águas turbulentas.
Segundo li e, especialmente quando cortado em quadrados e visto de lado, o efeito do bolo assemelha-se ás ondas do Danúbio (não sei, pois nunca vi as ondas do Danúbio ao vivo...).
O bolo é composto por duas camadas de bolo, uma de baunilha e outra mais pequena de chocolate, cerejas amargas (no original), seguindo-se uma camada de creme mousseline (creme pasteleiro que depois de frio é batido com manteiga) e o todo, é depois coberto com uma camada de chocolate derretido à qual se dá um efeito ondulado com um garfo.
As várias pesquisas que fiz sobre o bolo acabaram por me baralhar ainda mais, pois há quem escreva que as cerejas não devem afundar, há quem escreva que é precisamente o afundar das cerejas que vai dar o efeito das tais ondas do Danúbio, enfim... fiquei sem saber qual a versão correcta...
O certo é que, as minhas cerejas, apesar de todas elas irem bem protegidas com coletes salva vidas (envoltas em farinha), não houve nenhuma que não tivesse afundado no Danúbio... acho que estavam gorditas demais, lol!
Tenho de confessar que não estava propriamente entusiasmada com este desafio, pois não sou, nem ninguém é cá em casa, muito (nada) adepto de cerejas em calda.
Sinceramente, pensei que era um bolo que ia fazer e que iria ter de distribuir pela vizinhança, ou iria andar cá por casa até ir uma parte para o lixo, o que me provocaria dores na alma..., mas não!!!
Surpreendentemente, eu amei, o marido também e as crianças, bom tenho de ser honesta, tiraram-lhe quase todas as cerejas mas o resto, comeram tudo e de bom grado.
Quando se tira uma garfada de alto a baixo, onde todas as camadas são saboreadas na mesma garfada, este bolo é, de facto, brutalmente bom. A sério! Como disse antes, surpreendeu-me e bem!
Então? Convenci-vos a fazer um Bolo Donauwelle?
Resta-me acrescentar que, depois de muitas pesquisas pela net, todas as receitas que encontrava, ou utilizavam misturas de bolo de pacote, ou misturas de pudim de pacote e eu como não gosto de misturas dessas, optei pela receita da nossa Pierre Hermé do Algarve, a Patricia, pois a receita dela é toda feita de raiz.
Ajustei alguns ingredientes, métodos e medidas, de acordo com o meu gosto pessoal e experiência, mas de resto, mais uma receita de sucesso.


ingredientes para o bolo:
3 ovos 
140g de açúcar refinado branco
1 colher chá de pasta ou extracto de baunilha 
100ml de óleo vegetal
150ml de leite gordo + 1 colher sopa
230g de farinha com fermento 
2 colheres chá de cacau em pó
400g de cereja em calda (eu usei cerejas marrasquino e só usei cerca de 180g)
preparação:
Escorrer as cerejas meia hora antes. Depois de bem escorridas, polvilhá-las com um pouco de farinha e envolver bem.
Untar uma forma quadrada com 21 x 21cm (ou 20 x 20cm) e forrar com papel vegetal. Eu usei uma forma de silicone porque depois é mais fácil desenformar o bolo final.
Bater os ovos com o açúcar e a baunilha durante 10 minutos, até obter um creme esbranquiçado e volumoso.
Juntar o óleo e bater até ficar integrado.
Por fim juntar o leite alternadamente com a farinha peneirada e envolver delicadamente, até ficar homogéneo.
Colocar 1/3 da massa numa taça, juntar o cacau e 1 colher de sopa de leite. Reservar. 
Deitar a massa branca na forma e alisar bem.
Por cima, espalhar com cuidado a massa de cacau de forma a cobrir a branca sem misturar as mesmas.
Espalhar as cerejas por cima e pressionar uma a uma ligeiramente. 
Levar ao forno pré-aquecido a 180ºC durante 35 a 40 minutos, ou até o palito sair seco.
Desenformar e deixar arrefecer completamente sobre uma grelha.
ingredientes para a calda:
3/4 chávena (cup) de água
2 colheres sopa de rum escuro
1 colher sopa de açúcar refinado branco
preparação:
Colocar todos os ingredientes num tachinho ao lume e ferver até obter um xarope.
Reservar e deixar arrefecer.
ingredientes para o creme mousseline:
250ml de leite gordo
1 colher chá de pasta ou extracto de baunilha
100g de açúcar
1 ovo + 1 gema
55g de Maizena
100g de manteiga, à temperatura ambiente (eu precisei de mais 2 colheres sopa de manteiga para obter a consistência cremosa desejável).
preparação:
Colocar o leite e a baunilha num tacho e levar ao lume até levantar fervura.
Numa taça, bater o ovo, a gema e o açúcar.
Adicionar a Maizena e bater tudo muito bem, até obter uma mistura cremosa.
Juntar o leite quente em fio, mexendo vigorosamente.
Colocar a mistura de volta no tacho, levar ao lume e, sobre lume brando e mexendo sempre, cozinhar até a Maizena estar cozida, a mistura estar bem espessa e começar a ferver.
Transferir a mistura para uma taça e cobrir a sua superfície com película aderente. Deixar arrefecer completamente.
Depois de fria, colocar a mistura na taça da batedeira eléctrica e bater, juntando a manteiga, um bocadinho de cada vez, até obter um creme macio, leve e fofo.
ingredientes para a cobertura:
100g de chocolate negro de culinária (mínimo 70% cacau)
50ml de leite gordo
2 colheres sopa de manteiga
preparação:
Colocar todos os ingredientes num tacho e levar ao lume.
Sobre lume brando e mexendo sempre vigorosamente, cozinhar até o chocolate estar quase derretido.
Assim que o chocolate estiver quase todo derretido, retirar o tacho do lume e continuar a mexer sempre, até o chocolate derreter completamente e a mistura estar macia e brilhante. Reservar.
para finalizar e montar o bolo:
Colocar o bolo arrefecido de volta na forma.
Pincelar toda a sua superfície com o xarope de rum.
Cobrir o bolo com o creme mousseline, alisando bem a superfície com a ajuda de uma espátula.
Por cima deste, espalhar o chocolate derretido e arrefecido, alisar e depois passar com os dentes do garfo, por forma a criar o efeito ondulado.
Colocar a forma por umas horas no frigorifico, até as camadas estarem firmes, ou, de preferência, de um dia para o outro.
Na altura de servir, desenformar o bolo e cortar em quadrados.


Recipe / Receita: Coco e Baunilha.

27 January 2016

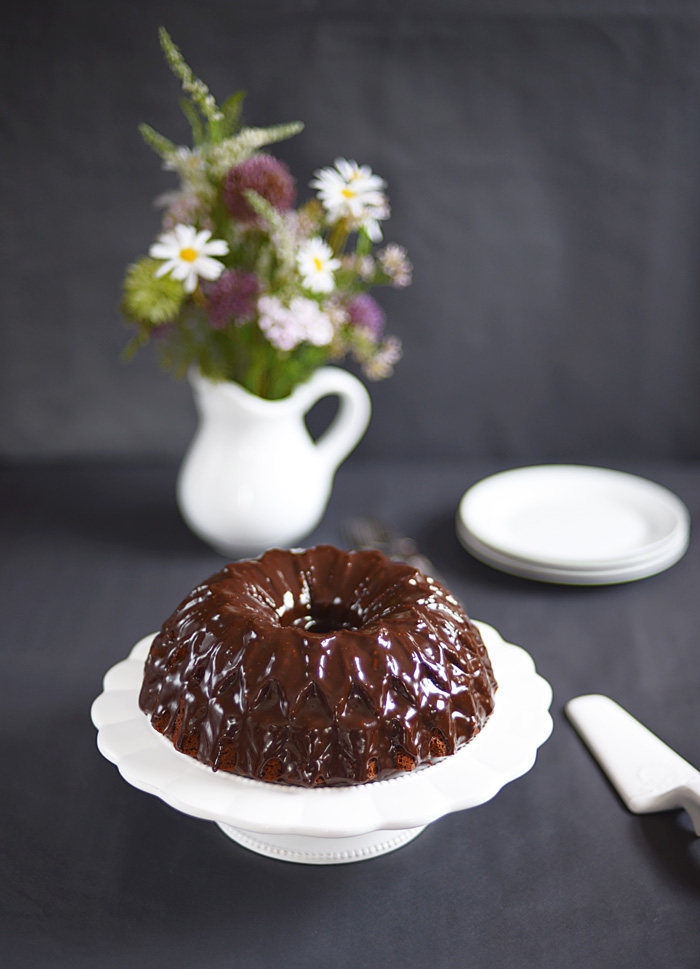
Pain d'Épices with chocolate sauce / Pain d'Épices com molho de chocolate.


Pain d'Épices is a French version of gingerbread.
The French classic pain d’Épices is usually sold in loaves but, sometimes, it is also sold in squares that have been cut from giant slabs.
Texture wise, it's a cross between a cake and a bread and it's made with lots of honey and spices.
This recipe is from Mima Sinclair fantastic "Gingerbread Wonderland" book and it is so delicious that my 9 years old daughter keeps on asking me to make it again.
Of course that the chocolate sauce makes it even more moreish and scrumptious and the combination is absolutely superb!!
ingredients:
300g runny clear honey
200g dark soft brown sugar
100g unsalted butter + extra for greasing
400g plain flour
1 tsp baking powder
1 tsp bicarbonate of soda
1/2 tsp salt
2 tsp ground ginger
1 tsp ground cinnamon
1 tsp ground nutmeg
1/2 tsp ground cloves
60g ground almonds
zest of 1 unwaxed lemon
3 medium eggs
50ml dark rum
1 tsp almond extract
for the chocolate sauce:
125ml double cream
1 tbsp dark soft brown sugar
25g unsalted butter
1 tbsp golden syrup
75g dark chocolate (70%), finely chopped
1 tbsp Cointreau
method:
Put the honey, sugar and butter in a saucepan over low heat and melt together, stirring occasionally, until the sugar has dissolved. Take the pan off the heat and let it to cool for 15 minutes.
Preheat the oven to 180ºC. Grease a (2l capacity) bundt tin and set aside.
Sift the flour, baking powder, bicarbonate of soda, salt and spices.
Fold through the ground almonds and lemon zest.
Pour the honey mixture into the flour mix and beat together.
Add the eggs, rum and almond extract and beat until combined.
Transfer the mixture to the prepared tin.
Place the tin on the middle shelf of the oven and bake for 25 minutes.
After that time, cover the tin with a double layer of foil and bake for a further 15 minutes or until a skewer inserted in the centre of the cake comes out clean.
Transfer the cake tin to a cooling rack and cool for 15 minutes before turning it onto the rack to cool completely.
to make the chocolate sauce:
Put the cream, sugar, butter and golden syrup in a small saucepan over a medium/low heat.
Stir until the sugar has dissolved and then remove from the heat.
Add the chopped chocolate and stir until melted and glossy.
Add the Cointreau and gently stir until combined.
Drizzle the hot sauce over the cake or serve separately.

__________________

O Pain d'Épices é a versão francesa do gingerbread.
Este clássico francês, é normalmente vendido em formato de pão (cozido em formas tipo bolo inglês) ou em fatias quadradas que foram cortadas de pães gigantes.
Para quem nunca provou, o Pain d'Épices leva uma boa quantidade de mistura de especiarias e uma boa dose de mel.
A sua textura é um cruzamento entre um pão e um bolo, por isso não esperem obter uma textura fofa de bolo.
Esta versão, é do livro Gingerbread Wonderland da Mima Sinclair e garanto-vos que, se gostam de Pain d'Épices, têm mesmo de experimentar esta receita.
Para os que nunca o provaram, está aqui uma boa oportunidade para o fazer, pois é delicioso e até a minha filha de 9 anos gostou tanto, que já me pediu para o voltar a fazê-lo brevemente.
Claro que a adição do molho de chocolate ajuda a torná-lo mais indulgente e dá-lhe aquele toque mágico.


ingredientes:
300g mel líquido claro
200g açúcar mascavado escuro
100g manteiga sem sal + extra para untar a forma
400g farinha de trigo branca
1 colher chá fermento para bolos
1 colher chá de bicarbonato de sódio
1/2 colher chá de sal fino
2 colheres chá de gengibre em pó
1 colher chá de canela em pó
1 colher chá de noz moscada em pó
1/2 colher chá cravinho em pó
60g amêndoa ralada (farinha de amêndoa)
raspa de 1 limão biológico
3 ovos médios (M)
50ml Rum escuro
1 colher chá de extracto de amêndoa
para o molho de chocolate:
125ml natas para culinária
1 colher sopa de açúcar mascavado escuro
25g manteiga sem sal
1 colher sopa de golden syrup
75g chocolate preto (70%), picado finamente
1 colher sopa de Cointreau
preparação:
Num tachinho sobre lume brando, colocar o mel, o açúcar e a manteiga. Aquecer, mexendo, até o açúcar estar dissolvido.
Retirar o tacho do lume e deixar arrefecer por 15 minutos.
Aquecer o forno a 180ºC e untar muito bem, uma forma tipo Bundt, com capacidade para 2l.
Numa taça, peneirar a farinha, o fermento, o bicarbonato, o sal e as especiarias.
Adicionar a farinha de amêndoa e a raspa do limão e envolver tudo muito bem.
Adicionar a mistura de mel à mistura da farinha e bater tudo muito bem.
Adicionar os ovos, o Rum e o extracto de amêndoa e voltar a bater até tudo estar bem combinado.
Deitar a mistura na forma e colocá-la sobre a grelha, colocada no meio do forno.
Cozer o bolo por 25 minutos.
Findo esse tempo, cobrir o bolo com uma camada dupla de papel de alumínio e cozer por mais 15 minutos, ou até que um palito inserido no meio do bolo saia completamente limpo.
Quando o bolo estiver cozido, colocar a forma sobre uma grelha de arrefecimento e deixar o bolo arrefecer dentro da fora por cerca de 15 minutos.
Findo esse tempo, desenformar o bolo sobre a grelha para completo arrefecimento.


para fazer o molho de chocolate:
Num tachinho pequeno sobre lume médio a baixo, colocar as natas, o açúcar, a manteiga e o golden syrup.
Mexer até o açúcar estar dissolvido e retirar do lume.
Adicionar o chocolate picado e mexer até este ter derretido e a mistura estar brilhante.
Adicionar o Cointreau e envolver delicadamente até tudo estar combinado.
Deitar o molho de chocolate quente sobre o bolo, ou servi-lo à parte.

Recipe / Receita:

12 August 2015

Dark chocolate, coconut and passion fruit mousse cake / Bolo de chocolate preto, coco e mousse de maracujá.


A few weeks ago was my husbands birthday and as soon as I saw this cake, I decided straightaway that it would be his birthday cake.
As chocolate and passion fruit are his favourite flavours, the decision was easy to make and this recipe ticked all the boxes.
The cake itself is named the "best ever chocolate sponge" and it truly is indeed the best chocolate sponge I ever made or tried.
The combination with the passion fruit mousse and the hint of the coconut, just turns it into an heaven cake.
ingredients for the cakes:
150ml vegetable oil, plus extra for greasing
200g plain flour
8 tbsp cocoa powder
2 tsp baking powder
1 tsp bicarbonate of soda
280g light brown soft sugar
200ml buttermilk
100ml strong coffee or espresso
2 tsp vanilla extract
2 large eggs
method:
Heat oven to 180ºC. Grease and line 2 x 20cm cake tins with baking paper.
Put the flour, cocoa powder, baking powder, bicarbonate of soda, sugar and 1/2 tsp of salt in a bowl and mix well.
Measure the buttermilk, coffee, oil and vanilla in a jug. Add the eggs and whisk until smooth.
Pour the wet ingredients into the dry and whisk until well combined.
Divide the cake mixture between the 2 tins, and bake for 25 to 30 minutes or until risen and a skewer inserted into the centre comes out clean.
Cool in the tins for 10 minutes, then turn out onto a wire rack, peel off the baking paper and leave to cool.


for the passion fruit and coconut mousse:
6 gelatine leaves
6 ripe passion fruits
160g can coconut cream
85g golden caster sugar
2 tbsp coconut rum liqueur (Malibu)
300ml double cream
method:
Put the gelatine leaves in a bowl of cold water, one at a time, so they don't stick together. Set aside for 5 mins to soften.
Scoop the pulp and seeds from the passion fruit into a sieve suspended over a bowl, and push through the juice (you should have about 100ml).
Put 1 tbsp of the seeds in a small bowl and set aside. Save 2 small empty passion fruit halves and discard the rest.
Pour the coconut cream, passion fruit juice and sugar into a saucepan and bring to a gentle simmer.
Remove from the heat and stir in the coconut rum liqueur.
Add the gelatine to the hot liquid, a leaf at a time, squeezing out the water before you add them. Stir until the gelatine has dissolved.
Fill each reserved passion fruit half with some of the mixture, place in a small dish and chill until needed.
Leave the remaining mixture to cool to room temperature.
Pour the double cream into a large bowl and whip until it's holding its shape. Add half the passion fruit mixture, fold together, then add the remaining mixture and fold through again.
Line a deep 20cm cake tin with a double layer of cling film.


for the chocolate ganache:
200g dark chocolate, around 70% of cocoa solids, finely chopped
300ml double cream
method:
Put the chocolate and cream in a pan and gently heat, stirring now and then, to make a runny chocolate sauce. Leave to firm up at room temperature until it reaches a spreadable consistency.
to assemble de cake:
4 tbsp coconut rum liqueur (Malibu)
toasted coconut flakes or shavings


to finish:
Slice each sponge in half through the middle and drizzle each layer with 1 tbsp of the coconut rum liqueur.
Place one of the layers into the tin, flat-side down, and spread with 1/3 of the passion fruit mousse.
Layer the remaining sponges and mousse on top, finishing with a layer of cake.
Cover the top of the cake with cling film and chill for at least 4 hours, or preferably overnight.
When the cake has chilled and the mousse is set turn out onto a cake stand (I used my new cake stand, made by Patricia, a very talented Pastry "Chef" and a truly artist. Just check her blog if you want to be truly impressed).
Remove the clingfilm and using a palette knife, scrape any passion fruit mousse off the edges of the cake, to give it a smooth surface.
Place the cake back in the fridge while you prepare the ganache.
Remove the cake from the fridge.
Spread the ganache over the top and sides of the cake with a palette knife until completely covered.
Decorate the top of the cake with a ring of toasted coconut shavings.
Remove the filled passion fruit shells from the fridge, top them with the reserved passion fruit seeds and place these on top of the cake.
Chill until ready to serve, but bring out of the fridge 1 hour before slicing.

__________________

Há umas semanas atrás o meu marido fez anos e assim que vi este bolo na revista de Julho da Good Food, não hesitei nem pensei mais em que bolo fazer-lhe, pois chocolate e maracujá são os seus sabores preferidos e como tal, este bolo preenchia todos os requisitos para ser o bolo perfeito para o dia.
Do coco ele não é muito (ou nada) fã mas como a quantidade de licor de coco utilizada no bolo em si, acaba por não se notar muito no resultado final do bolo e o coco utilizado para a decoração, ele o pôs de lado na altura de comer o bolo, acabou por não refilar muito...
O título do bolo de chocolate é "O melhor bolo de chocolate de sempre" e acreditem que é mesmo verdade, pois é, de facto, o melhor bolo de chocolate que já fiz, ou comi e eu, como sabem, nem sou nada fã de de chocolate.
A mousse de maracujá e os restantes componentes do bolo, acabam por transformar, o que, por si só, já é "o melhor bolo de chocolate do mundo", num verdadeiro momento de prazer e deleite.
A receita tem algumas etapas, mas não se deixem intimidar, pois qualquer um dos componentes é de facílima realização.


ingredientes para os bolos:
150ml óleo vegetal + extra para untar
200g farinha de trigo branca
8 colheres sopa de cacau em pó
2 colheres chá de fermento em pó
1 colher chá de bicarbonato de sódio
280g açúcar amarelo
200ml buttermilk
100ml café forte ou espresso
2 colheres chá de extracto de baunilha
2 ovos grandes (L)
preparação:
Aquecer o forno a 180ºC. Untar e forrar com papel vegetal, 2 formas de 20cm de diâmetro.
Numa taça, colocar a farinha, o cacau, o fermento, o bicarbonato, o açúcar e 1/2 colher chá de sal. Misturar tudo muito bem.
Num jarro, misturar o buttermilk, o café, o óleo e a baunilha. Adicionar os ovos e bater tudo até obter uma mistura macia.
Deitar a mistura líquida sobre a mistura dos ingredientes sólidos e mexer, por forma a incorporar tudo muito bem.
Dividir a mistura pelas duas formas e levar ao forno por cerca de 25 a 30 minutos, ou até os bolos estarem crescidos e um palito inserido no centro de cada bolo, saia limpo.
Deixar os bolos arrefecer nas próprias formas por cerca de 10 minutos e depois desenformá-los sobre uma grelha, retirando-lhes o papel vegetal, para completo arrefecimento.
para a mousse de maracujá e coco:
6 folhas de gelatina
6 maracujás bem maduros
160g creme de coco (parte sólida que se forma no topo das latas do leite de coco)
85g açúcar refinado amarelo
2 colheres sopa rum de coco (Malibu)
300ml natas para bater
preparação:
Colocar as folhas de gelatina, uma de cada vez, dentro de água fria e reservar por cerca de 5 minutos.
Colocar um coador sobre uma taça. Cortar os maracujás ao meio e retirar-lhes a polpa e as sementes. Passar tudo pelo coador, espremendo bem, por forma a extrair o máximo de sumo dos maracujás. São necessários cerca de 100ml de sumo de maracujá e deverá ser essa a quantidade obtida.
Reservar duas metades das cascas dos maracujás e 1 colher sopa de sementes e descartar todas as restantes sementes e cascas.
Num tacho, colocar o creme de coco, o sumo dos maracujás e o açúcar. Aquecer, mexendo, até o açúcar estar dissolvido e a mistura começar a querer levantar fervura.
Retirar o tacho do lume e adicionar o Malibu.
Retirar a gelatina da água, espremer bem o excesso de água e adicioná-la à mistura de maracujá, uma folha de cada vez, mexendo bem até que esteja bem dissolvida.
Encher as duas metades das cascas do maracujá reservadas com esta mistura, colocar sobre uma chávena ou algo que as mantenha direitas e refrigerar.
Deixar a restante mistura arrefecer até ficar à temperatura ambiente.
Bater as natas até estas estarem firmes mas sem bater em demasia.
Adicionar metade da mistura de maracujá ás natas e envolver bem até estar tudo bem incorporado.
Adicionar a mistura de maracujá restante e voltar a envolver bem.
Forrar uma forma funda, com 20cm de diâmetro com duas camadas de película aderente, pois é dentro desta forma que se irá montar o bolo.


para o ganache de chocolate:
200g chocolate preto (70%  cacau), picado finamente
300ml natas para culinária
preparação:
Colocar as natas e o chocolate num tacho e aquecer em lume brando, mexendo de vez em quando, até o chocolate estar derretido e a mistura estar macia.
Retirar o chocolate do lume e deixar arrefecer à temperatura ambiente, até atingir uma consistência que se possa ser barrado.
para montar o bolo:
4 colheres sopa rum de coco (Malibu)
flocos de coco tostados


montagem do bolo:
Cortar cada bolo ao meio, por forma a obter 4 discos.
Regar cada um dos discos com 1 colher sopa de Malibu.
Colocar um disco do bolo (parte plana virada para baixo) na forma forrada com a película aderente.
Barrar com 1/3 da mousse de maracujá.
Repetir com os restantes discos e a restante mousse, terminando com 1 disco de bolo.
Cobrir o bolo com película aderente e levar ao frigorífico por 4 horas, ou de preferência, de um dia para o outro.
Virar o bolo sobre um prato de serviço ou cake stand (eu usei este cake stand lindo da talentosa Patrícia do bolog Coco e Baunilha que é, não só uma verdadeira "Chef" de pastelaria mas também uma grande artista).
Retirar a película aderente do bolo e com a ajuda de uma espátula, alisar os lados, a fim de aplanar alguma mousse de maracujá que tenha escorrido para as laterais do bolo.
Se ainda não tiver preparado o ganache, colocar o bolo no frigorífico até o ganache estar pronto a barrar, caso contrário, barrar as laterais e topo do bolo com o ganache.
Espalhar os flocos de coco tostados à volta da extremidade do bolo, em forma de anel.
Espalhar as sementes de maracujá reservadas sobre a mousse de maracujá que foi colocada nas cascas e decorar o centro do topo do bolo com as mesmas.
Refrigerar o bolo até ao momento de servir, retirando-o do frigorífico cerca de 1 hora antes de o cortar.

Recipe / Receita: BBC Good Food magazine (July 2015).

29 May 2015

Rachel Khoo's cannelés / Os cannelés da Rachel Khoo.


As promised previously, here it is, Rachel Khoo cannelés recipe, which, for me, is the best one so far!!
This recipe is one of those that you can not decide to make on the day or even the day after.
This recipe needs to be planed ahead because the batter needs to rest in the fridge for, at least, 2 days. Yes, 2 days and that's what I meant when I wrote here that all recipes are different because for Mimi Thorisson recipe, the batter rests for 24 hours, for Donna Hay recipe, it rests for 2 hours and for this one, you need a minimum of 2 days resting time.
According to Rachel Khoo, this resting time is necessary in order for the flavours to infuse and to relax the gluten which will result in a tender and less chewy canelé and yes, she is totally right!!
ingredients (makes 14 to 16):
500ml full fat milk
50g unsalted butter, cubed
1 vanilla pod, split lengthways and seeds scraped
100g plain white flour, sifted
250g icing sugar, sifted
1 tsp salt
2 eggs
2 egg yolks
60ml rum
method:
Put the milk and butter in a saucepan with the vanilla pod and seeds.
Bring to the boil over a medium heat, then remove from the heat and allow to cool a little.
Put the flour, sugar and salt in a bowl.
In a separate bowl, lightly beat the eggs and the egg yolks together.
When the milk has cooled, remove the vanilla pod and set aside.
Pour the warm milk and eggs over the dry ingredients and gently stir everything together until smooth.
Strain the mixture through a sieve into a clean bowl. Add the rum and stir until combined.
Put the reserved vanilla pod back into the batter, cover with clingfilm and chill for two days or longer, remembering to give it a stir every so often.
Preheat the oven to 240ºC.
If using a silicone mould, heat it in the oven for a couple of minutes.
Fill each hole 4/5 full with the batter.
Cook for 15 minutes, then reduce the heat to 190ºC and cook for a further hour.
Remove from the moulds and leave to cool on a wire rack.

__________________

Tal como prometido aqui, deixo-vos hoje com a receita dos canelés da Rachel Khoo que, na minha opinião, são os melhores que já fiz!
Esta é daquelas receitas que não pode ser pensada no dia, ou até na véspera. Esta receita tem de ser pensada com uns dias de antecedência, pois a massa tem de ficar a repousar no frigorífico por um mínimo de 2 dias. Sim, 2 dias, não é engano!!
Por isso escrevi neste post, que todas as receitas que experimentei até agora diferem e diferem em especial, no tempo de repouso da massa, pois nesta receita da Mimi Thorisson, a massa repousa por 24 horas, nesta da Donna Hay, a massa repousa por 2 horas e nesta que hoje vos apresento, a massa repousa por 2 dias.
Segundo a própria Rachel, a massa precisa deste tempo de descanso, para que os sabores apurem e a fim de relaxar o gluten da farinha, se ela tem razão ou não, não sei, o que sei, é que estes são de facto uns canelés absolutamente divinos e, até encontrar outra receita a experimentar, esta é a eleita.
O interior fica macio, fofo e sublime e o exterior é de um crocante absolutamente fenomenal e único!


ingredientes (para 14 a 16 canelés):
500ml leite gordo
50g manteiga sem sal, em cubos
1 vagem de baunilha, cortada ao meio longitudinalmente e sementes raspadas
100g farinha de trigo branca, peneirada
250g açúcar em pó, peneirado
1 colher chá de sal
2 ovos
2 gemas
60ml rum


preparação:
Num tacho, colocar o leite, a manteiga, as sementes da baunilha e a vagem.
Levar o tacho ao lume médio, até levantar fervura. retirar o tacho do lume e deixar arrefecer um bocado.
Numa taça, colocar a farinha, o açúcar e o sal.
Numa taça à parte, bater ligeiramente os ovos e as gemas.
Quando o leite tiver arrefecido um bocado, retirar a vagem de baunilha e reservá-la.
Juntar o leite e os ovos aos ingredientes secos e mexer delicadamente, a fim de incorporar todos os ingredientes e obter uma mistura macia.
Passar a mistura por um coador para um afaça limpa e adicionar o rum e mexer outra vez para incorporar.
Voltar a colocar a vagem da baunilha dentro do creme, tapar com película aderente e refrigerar por, no mínimo 2 dias, mexendo de vez em quando.
Aquecer o forno a 240ºC.
Caso utilizem formas de silicone, aquecer a forma no forno por uns minutos.
Encher as formas até 4/5 com a mistura e levar ao forno por 15 minutos.
Baixar a temperatura do forno para os 190ºC e cozer os canelés por mais uma hora.
Desenformar imediatamente e deixar arrefecer sobre uma grelha.

Recipe / Receita:

29 April 2015

Canelés de Bordeaux and Paris.


Finally The post!
A long post and a way to remember the beautiful moments I spent in paris last month.
As I wrote here, I went to Paris with my sister and niece. It was my second time in the City of Light and I loved it even more than the first time.
Paris is indeed an incredible beautiful City and we had a fabulous time.
At the end of this post there's some images of the touristic and cultural places we've been, the places for foodies that we visited and some of the amazing food we had. The photos are not the best as most of them were taken with the iphone but they are ok just for you to have an idea of what we did.
The weather was not great and there was a lot of pollution in the air but we enjoyed ourselves very much and we had lots of fun.
Saying that and like I also wrote here, I had my first Canelé Bordelais at Les Halles but to be honest, I didn't like it very much. It was too dry and tasteless.
As we visited E. Dehillerin, a shop that I also visited the first time I went to paris and the one that is famous because it was the shop where Julia Child was buying her gadgets and kitchen ware while she was living in Paris (there's a very old picture of Julia Child hanging on one of the walls of the shop), I bought the tins to make the famous Canelées, as I was determined to find out if they are amazing or just tasteless like the one I tried.
The recipe I used is from Mimi Thorisson cook book and it's a recipe that has already been tested and approved here at Marmita's blog and I can reassure that they are absolutely divine and delicious and nothing like the one I tried in Paris.
A recipe that, here at home, will be repeated more often for sure!
ingredients (makes 16):
500ml whole milk
1 vanilla bean, split lengthwise, seeds scraped and reserved
200g granulated sugar
120g plain flour, sifted
3 large egg yolks, at room temperature
30g unsalted butter, melted
60ml dark rum


method:
In a saucepan, whisk together the milk and vanilla seeds.
Bring to a boil, then remove from the heat and set aside for 5 minutes.
Transfer to a bowl.
Whisk in the sugar and flour. Add the egg yolks one by one, whisking gently to mix.
Stir in the butter and finally add the rum. Whisk until smooth.
Cover and refrigerate for 24 hours.
Preheat the oven to 230ºC.
Fill 16 canelé moulds 2/3 full and bake for exactly 5 minutes. Lower the oven temperature to 180ºC and bake for an additional 50 minutes, or until the canelés are dark brown.
Let the canelés cool in the moulds for 5 minutes, then unmold them on a wire rack.
The canelés will keep for several days in a sealed container at room temperature.
__________________


Finalmente "O" post!
Um post mais longo que de costume mas que serve também para mim e para registar e relembrar os bons momentos que passei em Paris no mês passado.
Tal como escrevi aqui, no mês passado fui passar uns dias a Paris com a minha irmã e sobrinha.
Foi a minha segunda visita á Cidade da luz e posso assegurar-vos que gostei ainda mais de visitar esta cidade do que da primeira vez. Espero que haja uma terceira vez, pois ainda muito ficou por descobrir.
Podem ver a seguir alguns registos fotográficos de momentos, monumentos históricos e culturais visitados, locais obrigatórios a visitar para foodies e comidinhas e petiscos que provámos e comemos. As fotos não são as melhores, mas dá para ter uma ideia do bom que foi.
O tempo não estava lá grande coisa e havia muita poluição no ar, o que aliás, podem constatar pelo cinza constante do céu e pelo "nevoeiro" de algumas fotos, mas não foi impeditivo para que nos divertíssemos e tirássemos o melhor partido da viagem.
Como escrevi também neste post, provei o meu primeiro Canelé Bordelais no mercado Les Halles mas para vos ser sincera, não gostei nada, pois estava muito seco e não tinha sabor nenhum.
Ora, como já o tinha feito na minha primeira viagem a Paris e desta vez repeti, fiz compras na  E. Dehillerin, a loja parisiense de gadgets de cozinha que tem de tudo e mais alguma coisa para quem gosta da arte de cozinhar e que é famosa pois era a loja onde a Julia Child comprava os seus gadgets enquanto viveu em Paris. Uma foto muito velhinha e quase descolorada da Julia Child, faz parte da decoração de uma das paredes da loja que, por si só, é também uma loja à antiga e nada de computadores ou tecnologia.
Tudo o que ali é comprado, tem de ser procurado por códigos que estão escritos em grandes listas na loja e os produtos têm o código à frente, ou seja, temos de ir consultar a enorme lista de códigos, a fim de descobrir o preço dos produtos que queremos e diga-se de passagem, que não são nada baratos. Depois há que pedir os produtos a alguém da loja, que os vai buscar e os entrega ao Senhor da caixa, a quem se paga e depois têm de ser levantados num balãozinho ao lado, onde já foram embrulhados e nos são entregues, mediante a apresentação do comprovativo de pagamento. Um sistema lento e longo, mas que é o adoptado.
Esta conversa toda para dizer que nesta fantástica loja, comprei as famosas formas para os Canelés de Bordéus.
Há tempos que os queria fazer, mas cá não encontrava as formas e então a compra delas, foi uma das prioridades em Paris.
A receita que utilizei é da Mimi Thorisson.
Uma receita que já foi testada, aprovada e repetida aqui, na cozinha da Marmita e que posso agora reforçar o quão maravilhosos e deliciosos são e não têm nada, mas mesmo nada a ver com aquela coisa horrorosa e seca que comi em Paris.
Já sabem, se quiserem experimentar a receita, visitem este post da Marmita, pois é a mesma exactamente e está lá tudo muito bem explicadinho.

Recipe / Receita:


PARIS